

Cabinet Refinishing & Painting Guide for Vancouver, WA Kitchens
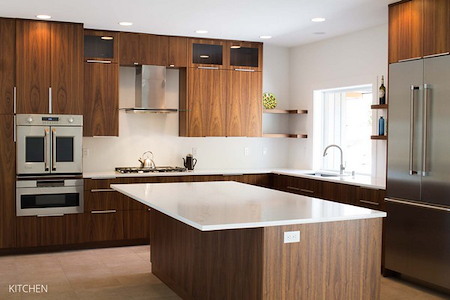
Kitchens in Vancouver, WA work hard. Between family dinners, school lunches, and weekend gatherings, your cabinets take a beating from fingerprints, steam, and daily bumps. This guide explains how a professional interior painting approach delivers a smooth, durable cabinet finish that stands up to real life while brightening rooms during our long, overcast seasons.
If you want a finish that looks custom-built and lasts, the key is process. Below, you will see how Fletcher Painting Co., Inc. prepares, contains dust, and selects coatings that perform in busy Clark County homes from Felida and Salmon Creek to Fisher’s Landing and Cascade Park.
Why Kitchen Cabinets In Vancouver, WA Need A Different Approach
Cabinets live in the harshest room in the house. Heat from cooking, moisture from dishwashers, and cleaning sprays all attack paint films. Many Portland-metro and Vancouver homeowners also prefer lighter colors to fight winter gloom, which means any surface flaw or dust nib shows fast under pendant lights and skylights.
Homes near the Columbia River can experience seasonal humidity swings. That affects how coatings level, cure, and resist sticking. A professional plan accounts for these local conditions so doors, drawers, and boxes cure hard, resist blocking, and clean up easily.
Our Professional Multi-Step Cabinet Refinishing Process
Great results come from disciplined prep and controlled application. Below is the high-level process our crew follows so your finish looks factory-smooth and wears well for years.
- Proper degreasing comes first. We remove cooking oils and silicone residues with a dedicated cabinet-safe degreaser, then rinse and wipe until water sheets clean. Paint cannot bond to hidden kitchen grime.
- Precision labeling and removal. Every door, drawer, and hinge gets labeled for perfect reassembly and consistent reveals.
- Repairs and surface prep. We fill dings, set proud grain, scuff-sand for mechanical adhesion, and vacuum with HEPA filtration. Edges and profiles get special attention.
- Masking and protection. Floors, counters, and appliances are protected. Cabinet interiors are masked per your preference if boxes are being sprayed.
- Adhesion primer. A bonding primer designed for slick cabinetry is sprayed for a uniform, tight-gripping base. Tinting can improve coverage for light topcoats.
- Fine-sanding between coats. Light sanding and tack vacuuming remove dust nibs and help each layer lay flatter than the last.
- Fine-finish spray application. We use pro equipment with fine-finish tips to lay down even coats with minimal texture on doors, drawers, and frames.
- Controlled cure. Temperature and airflow are managed so coatings level and harden correctly before doors are rehung and hardware installed.
Doors and drawers are often finished in a controlled spray environment when scheduling allows, while boxes are prepped and sprayed on-site inside a containment zone to protect the rest of your home.
On-Site Dust Containment That Protects Your Home
Refinishing should not disrupt your life. Our setup creates a sealed work zone so the rest of the house stays clean.
- Plastic zip-walls isolate the kitchen and create a defined entry point.
- HEPA air scrubbers and containment that creates negative air help capture fine dust and overspray.
- Vents and returns are protected so dust does not migrate into the HVAC system.
- Tack mats and daily housekeeping keep traffic paths clean.
This approach matters in open-plan homes common in Vancouver neighborhoods, where kitchens connect to living rooms and hallways. Good containment means you can keep the rest of your home running while the work proceeds.
Local insight: During damp fall and winter weeks, cure times can lengthen. Good airflow and controlled temperatures help coatings reach full hardness and resist sticking, so plan your project before major holidays if possible.
Conversion Varnish Vs. Acrylic Enamel: Which Performs Best In Kitchens
Homeowners often ask which cabinet finish stands up better to daily life: catalyzed conversion varnish or premium waterborne acrylic enamel. Both are professional-grade when applied correctly, but they behave differently.
Conversion varnish is a catalyzed, two-part finish prized for chemical and abrasion resistance. It levels into a firm film that shrugs off frequent cleaning. Many systems lean warm in tone and may amber slightly over time, which can be desirable with wood tones but needs consideration with bright whites. This product requires careful mixing, spray equipment, and a controlled environment.
Waterborne acrylic enamels have advanced a lot. They offer excellent hardness and block resistance with lower odor, faster re-coat windows, and easier on-site use. They retain color very well, especially in cooler whites, and are simpler to touch up later than a catalyzed system. In most busy family kitchens, a top-tier waterborne enamel is an ideal blend of durability and appearance.
Our recommendation depends on your goals. If you want the absolute toughest shop-grade finish and accept a more complex process, conversion varnish is a strong candidate. If low odor, color stability, and easier maintenance win the day, a premium acrylic enamel delivers outstanding performance for Vancouver homes.
Lighting And Sheen Choices For Overcast Vancouver Winters
Short, gray days can make kitchens feel flat. Color, sheen, and placement help you borrow light and reduce shadows without creating glare.
For cabinet doors and frames, satin or semi-gloss balances cleanability and light bounce. Satin softens reflections on shaker rails while still reflecting ambient light. Semi-gloss increases reflectivity and wipe-ability on high-touch areas like trash pull-outs and sink bases. On adjacent walls, an eggshell finish limits glare bands from windows or under-cabinet lighting.
When choosing color, aim for light reflectance values in the 60–80 range for a bright but comfortable look. Cool whites and soft grays can go slightly blue under 5000K bulbs, while warm whites can drift creamy with 2700K lighting. A neutral 3000–3500K LED keeps finishes true across cloudy mornings and evening tasks.
Ask for a large sprayed sample door and view it in daytime shade and under your actual LEDs. Edge profiles and panel shadows will reveal how sheen affects perceived color throughout the day.
What To Expect During The Project
Every kitchen is unique, but the flow is predictable. We start with a walkthrough to confirm scope, access, and protection. Hardware is cataloged and stored. Doors and drawers are removed and finished, while boxes are prepped and sprayed inside a sealed zone.
Daily communication sets expectations for appliance access, sink use, and traffic paths. We keep a tidy site, and we schedule reassembly only after coatings have set to a safe handling hardness. If we are coordinating with new countertops or backsplash work, we will sequence steps so finished cabinets are protected from other trades.
For deeper color changes or oak grain reduction, allow extra time for fillers and sanding between coats. That investment produces flatter panels and a more custom look that holds up under island pendants and daylight from large sliding doors.
Care And Cleaning After Cure
Paint films continue to harden after final application. Avoid heavy scrubbing and stacked rubber mats on freshly refinished surfaces until the coating has reached a strong cure. Use mild soap and water, not ammonia or abrasive pads. Felt pads on chair backs and door bumpers reduce edge wear near sinks and dishwashers.
Never skip cure time for new finishes when reinstalling organizers, adhesive hooks, or child locks. Gentle use in the first weeks pays off over the long haul, so doors swing clean and stay chip-free.
How We Tackle Grease, Moisture, And Daily Wear
Kitchen residues can hide along crown, hinge cups, and pull edges. Our team spends unhurried time deep-cleaning and rinsing those zones before any sanding happens. That sequence prevents grinding oils into the substrate and gives primers a fresh surface to bite.
Inside sink bases and near cooktops, we favor primers and topcoats with strong moisture and chemical resistance. Shelves and trash pull-outs see frequent contact, so we apply extra attention to edges and undersides where hands land first. These details reduce touch-up needs and keep high-traffic Vancouver kitchens camera-ready.
Choosing The Right Partner
Cabinets are one of the most used and most seen surfaces in your home. They deserve a system that respects your time and investment. Fletcher Painting Co., Inc. combines disciplined prep, tight dust control, and finish options tailored to the Pacific Northwest climate. You can read more about our whole-home approach to walls, trim, and ceilings on our interior painting services page, which explains how we sequence projects with minimal disruption.
To learn about our team, services, and recent projects, explore how we handle kitchen cabinet painting in Vancouver, WA, and other interior updates for families across the area.
For trusted kitchen cabinet painting in Vancouver, WA, call Fletcher Painting Co., Inc. today.
Ready To Love Your Kitchen Again?
Whether you live near Hazel Dell or out toward Fisher’s Landing, our process is built for busy homes. We protect your spaces, manage odor and dust, and finish with coatings that handle real-world use. When you are ready to refresh your space, start the conversation on our interior painting page, then schedule a visit that fits your calendar.